|
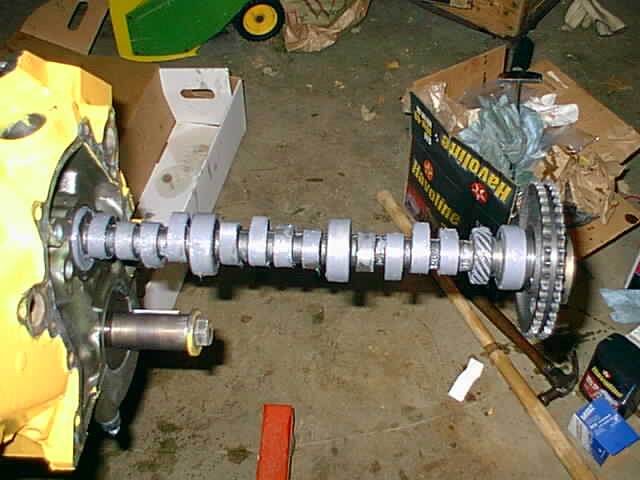
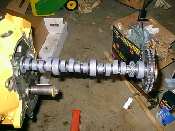
The next thing we're going to install is the camshaft. I'm reusing my camshaft, but the procedure
is identical for a new camshaft. If the dowel pin is out, put it into the camshaft. Most Ford
cams come with two dowels. Mine took the shorter of the two, and I had to tap it in using a
hammer. With the dowel in place, take a handful of moly lube, and smear down the entire camshaft,
including the lobes, journals, and the distributor gear. With the old gear installed on the cam,
gently feed the camshaft into the block. Do it nice and slow to prevent dinging the cam
bearings. Now rotate the camshaft around using the gear. The motion should be smooth and easy,
with the cam stiffness even the whole way around. If the cam is binding, it needs to be
corrected. Better to do it now while it's easy to get at then to have to tear the whole motor
down again.
|
|
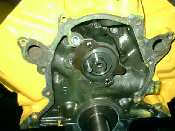
The cam thrust plate is next. Make sure all three oil galley plugs are in place before
continuing. If you're using a roller chain for the first time, you will need
to grind some of the plate down. Cloyes timing chains include instructions for where, if you bought
a different set, just check the plate with the gear. The little bolts that hold the plate in place are
short head bolts, especially made for this application. If you lose them, go to a dealership to
get the correct ones, hardware store bolts won't work. With the plate in place, torque the bolts
to 7-9 ft/#. Now install your cam gear, and snug the nut up. Check for interference by rotating the
gear a full revolution. If everything clears, check the endplay. There should be a tiny bit,
to avoid binding. You can measure this with a feeler gauge. The book says .005 clearance between
the thrust plate and the gear.
|

|
Remove the cam gear. Now turn the crank so that the #1 piston is at TDC. The crankshaft
keyway should be at 12 o'clock. Put a light coating of oil on the crank snout to ease in the
bottom gear installation. The timing set will have a set of marks corresponding to different
amounts of advance. Since most performance cams have "advance ground in" you should install them
straight up. Ask your engine builder for the correct installation. Rotate the cam so the gear and the
dowel line up with the two gears in correct position. Now slide the bottom gear to 1/2" off
the seated position. Put the chain around the gear, and place the top gear in the chain. Simultaniously
push the two gears until the top gear is seated on the cam, and the bottom gear is seated completely
against the crank. Install the fuel pump eccentric (which keeps the dowel in place),
washer, and top gear bolt. Torque to 40-45 ft/#.
|

|
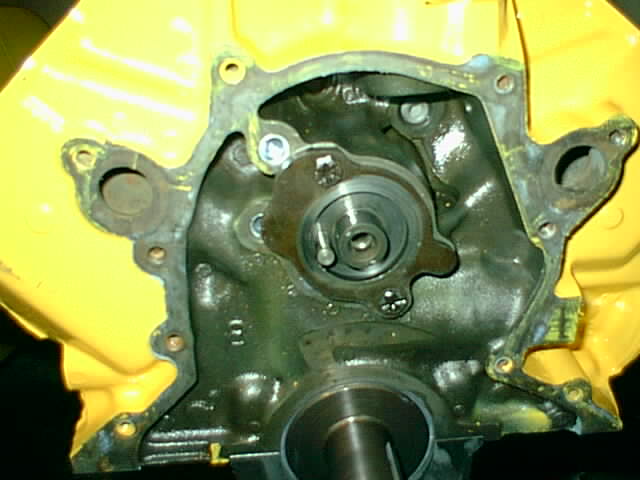
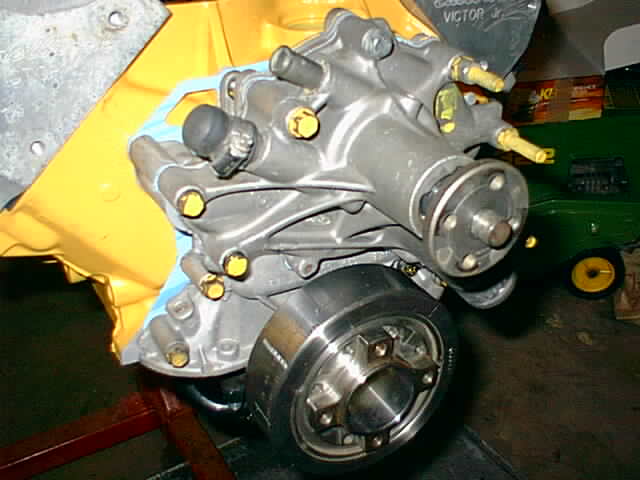
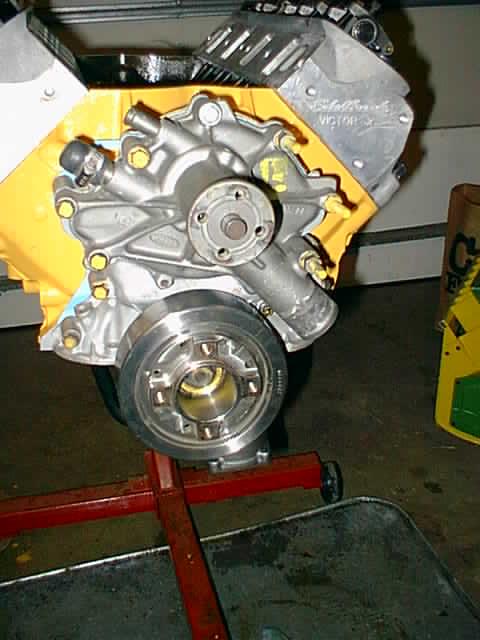
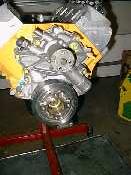
If you like scraping gaskets, you'll love the next part. Get your water pump and timing chain
cover out of storage, and completely clean all gaskets from the surfaces. Then clean all the bolts
that hold this assembly together. I let mine soak in Coca Cola for a couple hours to get the rust
off (yes this really works). If you're like me and buy specific head gaskets, intake gaskets,
oil pan and valve cover gaskets, you will want to buy a FelPro R.A.C.E. gasket set (remainder to
assemble complete engine). It includes the front and rear main seals, timing chain, water pump,
oil pump, and thermostat gaskets. It's cheaper than buying all these gaskets seperately. I
use RTV Ultra Grey to assemble every gasket that uses sealer. I've had the best luck with
it. First I apply a thin skin to the block. This holds the timing chain gasket in place. Then
I put a thin skin on the cover itself. Now install the cover with the 6 bolts that go through just
the cover. Make sure the crank snout is centered in the front seal. Repeat for the water pump.
Now install the balancer. Put a little oil on the crank snout. Install the balancer so it engages the
keyway. Use a piece of wood and a hammer to drive the balancer on gently until the bolt can grab at least
6 turns. If you can't get the balancer on far enough, you will have to get an installer tool. Now use
a ratchet and gently draw the balancer up to the lower timing chain gear.
|
|
| |
|
|