|
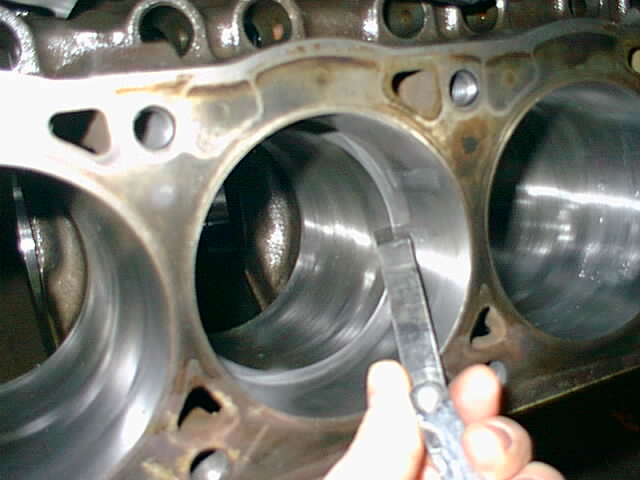
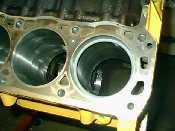
Now the real fun begins. File fitting rings. Most serious race engines use file fit rings
to get the end gap perfect for the bores for your particular engine. This is a frustating
but necessary step in rebuilding your engine. If you look at this picture, you will see that
there is no end gap in the ring (the "gap" is actually at about 11 o'clock in the bore, but
the camera doesn't show the line). Most file fit rings are made .005 too big, so you will
have to remove about .020 material to make them right.
|
My engine builder specified .018 gap for the top ring and .012 for the bottom ring. These
numbers will vary depending on the application and ring material, so make sure you check with
either your machinist or the ring manufacturer for the correct gap. For example, because of the
extra heat associated with a boosted application, the ring gap needs to be opened up further
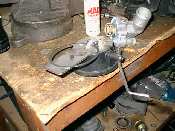
when using a blower or a turbo. The correct tool for this job is a ring grinder. Don't get
sucked into saving a couple bucks and trying to file them with a file in a vise. You'll just
get frustated and buy the ring grinder anyway. Since I don't do this for a living I bought
a manual ring grinder from Summit Racing for about $40. There are also electric ones that you
can enter the amount of material to take off and it does everything for you, but get out your
checkbook if you think you're buying one of those.
|
|
|
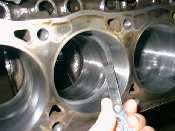
The trick here is to take it easy for the first ring so you get a feel for it. Take off a little
at a time until you get the gap where you want it. Since they don't include a practice ring
with your set, if you make the gap too big, you just lost power. The second ring is usually
softer than the top ring, so remember to do the second one easy too. I did all the top rings
first, then all the second rings. Make sure you keep them in order, and measure the rings in
the bore that they will be installed in. When you grind the rings, you must grind in the same
direction. Just put the ring top side up every time you grind material off. The ring is
marked with a dot to indicate the top. Here you can see that I'm using a feeler gauge to
check the end gap. To measure the end gap, put the ring in the top 1/2 inch of the bore, then
use a piston upside down to push the ring squarely down into the bore about another 1 1/2
inches. The ring must be square in the bore to get an accurate reading.
|
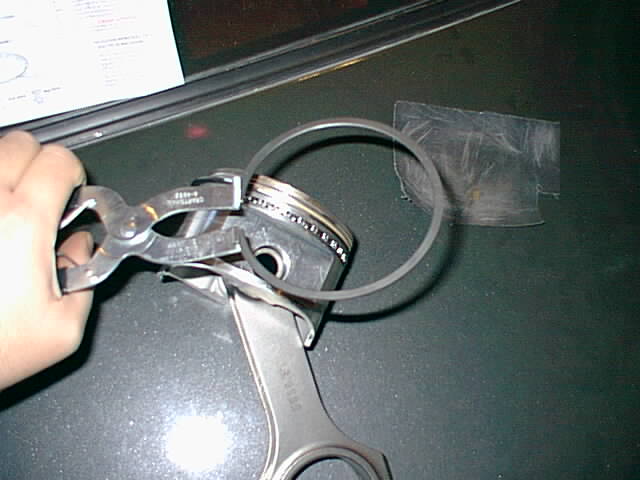
After you have filed all the rings, take the filed ends, and use some emery cloth to deburr the
ring gaps. This will prevent the ring ends from sticking in the ring lands on the piston. Wipe the
rings down with some brake cleaner and a paper towel to get the filings off. Once you get the
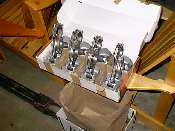
rings cleaned, pull your pistons out of storage. If your machinist didn't install the rods for
you, you will have to mount them yourself. With a full floating piston pin, there is a set of
SpiroLocks that holds the pin inside the piston. Note that the rod is not reversible. If you look
at the big end, you'll notice that one side is chamfered more than the other. This is the side that
faces the crank weight. Use a little light oil to lube the pin before putting it in. Mark the pistons
with cylinder numbers as you're going along (although the rod should face the same way on every
piston...). Now install the rings on the appropriate piston. The oil rings come first. When
looking from the top of the piston, the oil ring end gaps should be located at 8 and 10 o'clock,
with the seperator ring endgap at 9 o'clock. Use a ring installer on the two compression rings,
don't just try to "thumb them on". This $5 tool will keep you from breaking a ring or nicking
a ring land. The second ring goes on first. Place the endgap at 4 o'clock. Now the top ring goes
on, with it's endgap placed at two o'clock.
|

|
|
With all the rings installed on the pistons, set the pistons aside, and get ready for the next
step in this project.
|
| |
|
|
Page: